Installing “Search the Works” on
computers running recent versions of Windows
The files in this installer ZIP file will allow you to install Search the Works on a computer running a version of Windows more recent than XP. Download the ZIP file and extract its files into a single folder on your computer (it can be a “temp” folder, but be sure it’s one you can find easily once the download is finished).
Once the download is finished, navigate to that folder on your computer and click on and read: “1- How_to_install_on_Windows_7-Vista.html” (the same instructions are here on this page).
System requirements
- Intel Pentium 600 MHz or equivalent processor
- Microsoft Windows 7 or a more recent version of Windows
- 128MB of RAM (256MB recommended)
- 175MB of available hard-disk space
- a DVD drive
Installation
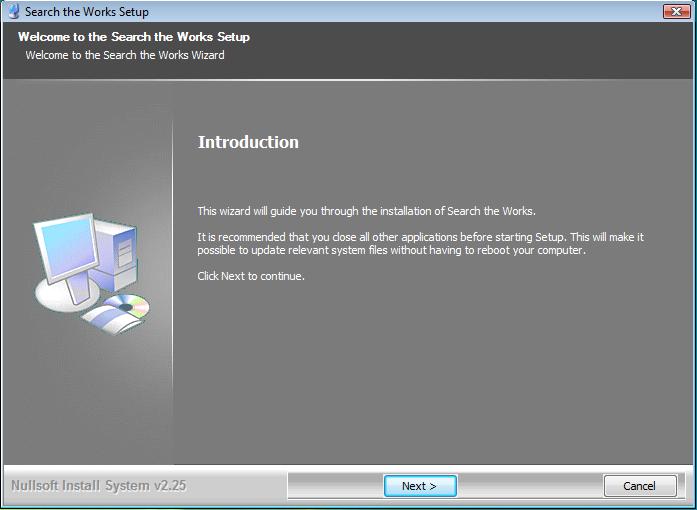
Navigate to the folder in which you stored the files you downloaded in order to install Search the Works on your Windows computer. Once in that folder, locate the Search the Works – Windows 7-Vista Installer.exe file and double-click on the filename. A dialog may warn you that An unidentified program wants to access your computer; if so, click on Allow to continue and wait while the program loads. Once it has loaded, press Next.
Before the program is installed, you will need to choose the directory in which you want it installed. The default option is C:\Program Files (86)\Search the Works on Windows 7 or C:\Program Files\Search the Works under Vista, which will put the program itself on your hard drive (most hard drives on home computers are located on the C:\ drive). If you want to browse through your hard drive for a good location other than Program Files, press Browse. When you are satisfied with your choice of location, for installing the program, click Next.

A window will appear that allows you to choose the Start Menu folder. The default option will create a shortcut icon in a new Start Menu folder, called Search the Works. If you use this default, you would start Search the Works from the Start menu, clicking on Start > All Programs >Search the Works. Once you have made your choice, click Next to continue.

This Confirm Installation window allows you to review the selections you have made. If you are satisfied with what you see, click Install to continue. Please note that the installation process may take 15 or as many as 45 minutes, depending on your computer.

Then click Finish on the Installation Complete page. If a message, saying This program might not have installed correctly pops up, you can safely ignore it and click on This program installed correctly.
You must restart your computer before running “Search the Works.”
Uninstalling “Search the Works”
At some point, you might want to remove, or uninstall, Search the Works from your computer altogether. Assuming you used the default settings above, you can un-install the Search the Works program, by clicking on Start in the lower left corner of your screen, clicking on All Programs > Search.